Wednesday, 29 December 2010
Thursday, 23 December 2010
Sunday, 19 December 2010
"STRETCH" EXPERIMENTATION
For this experiment, I edited the letters separately by copy and pasting them as mask layers rather than object layers. I think that the irregularity in the way that the letters stretch looks accidental rather than deliberate. I also experimented with opacity and colour. I think that the opacity is too much and makes the word too faint and I think that the colour just doesn't work.
"BOUNCE" EXPERIMENTATION
For this animation I worked from this storyboard :
I think that it works to some extent, but the regularity of the bouncing need to be adjusted, for instance, I feel that the bouncing doesn't look natural as I intended it to. I added the additional detail of the circle becoming slightly squashed and then bouncing back to a full circle each time it lands to make the object appear more realistic, which I had not discussed in the storyboard. I worked with this duck egg blue colour as I am bored of working in black and white, however I think that untill I've got the animation right, it might be best to work in black and white. I have managed to rent the digital colour book on this modules reading list, so I am going to do some research into the best ways to use colour.
Saturday, 18 December 2010
'STRETCH' EXPERIMENT
For this design I worked from this storyboard :
Here I have created the word using illustrator and then expanding it so that all points of the letters are editable. I then copy and pasted the object into After Effects, rather than importing it. This is because I wanted to be editable within After Effects, while normally you would not have this option. After Effects automatically treat the layer as a mask, but this is not a problem. Working out how to do this took considerably more time that it actually took for me to animate, but I am really pleased with the result. Now that I know how to achieve this I can try and make it more controlled or more detailed. I wanted there to be an element of randomness to the speeds and areas that stretch, but I don't think it's quite right.
MASKS
Here I have animated a mask to create a shape. I have also experimented with feathered edges to create a soft edge
Friday, 17 December 2010
MASKS
Here I have experimented with creating a mask and then applying it to something to give it a practical use....
Wednesday, 15 December 2010
OPACITY EXPERIMENTS
Experimenting with the opacity via 'start' and 'end' using keyframes:
Experimenting with animating the opacity word by word:
AFTER EFFECTS NOTES 3rd WORKSHOP
Working with text in After Effects:
anchor layer is moved (therefore anchor point is centralized):
'pan behind tool' allows you to move anchor point, rather than layer:
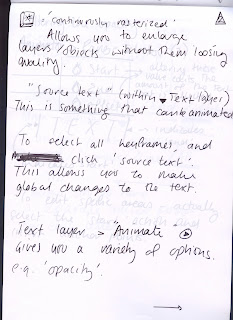
'continuously rasterize' button is constantly checked with text layers (allows you to resize text without loosing quality)
text options:
using 'source text' within text layer.
Add key frame, then edit text between start and end point:
(see video)
using the 'animate' option. Clicking on this brings up a range of tools:
experimenting with the opacity:
experimenting with Animate >skew:
using 'range selector' to edit specific areas using anchor points:
this allows you to be specific with which words/elements you want to edit:
(see videos)
editing 'advance settings'> 'based on' and then selecting whether you want the opacity to animate character, word or line at a time:
(see videos)
animating text scale:
use 'range selector' to edit specifically where the scaling will animate:
editing the 'anchor point grouping' via 'more options':
changing it to 'all' creates one anchor point per character:
this keeps the characters from overlapping:
(see video)
MASKS IN IN AFTEREFFECTS:
create a solid layer:
create a shape using shape tool whilst the solid layer is selected, this creates a mask.
this shape is vectorised and can be manipulated:
bounding box allows you to alter scale:
mask properties:
'mask expansion' allows you to control how much of the layer is shown:
'mask opacity' allows you to alter the opacity:
'mask feather' allows you to add a soft edge:
'mask path' allows you to alter the bounding box via 'shape':
if you enable keyframing and edit the shape, the shape can become animated:
(see video)
practical application would be using the mask as a view finder e.g. slowly revealing text...
(see video)
illustrator outlines can be brought on to after effects. Import artwork as either:
a) As a composition, or
b) Copy and paste it as a mask (make sure a layer is selected)
Shapes will become masks.
When animating, select all masks as this makes it easier, then you don't have to keep selecting the correct mask.
Taking advantage of 'paths' within text editing.
pen tool a path:
path options; (select path) makes text fit to path:
altering first and last margins allows you to move text along path:
adding key frames allows you to animate
(see video)
Illustrator shapes cannot be manipulated on After Effects in this way unless they are copy and pasted (and automatically become Masks). However these masks can be used as the art work and animated accordingly.
Subscribe to:
Comments (Atom)


